Bridal Shower Gift: Rhinestone Robe

The Allison-is-getting-married extravaganza continued past the bachelorette party on to bridal showers and the infamous Panty Party shower.

Being the bling lover crafty maven that I am, I had to come up with a unique and sexy gift idea for her Panty Party. Now I love the cute satin robes that say bride in rhinestones, but let's be real: No one is wearing that after the wedding day. It's like wearing a pin that says "It's my birthday" four months after your birthday.

I wanted her gift to be custom-fit for her so I went on the hunt. I found an iron-on rhinestone transfer on etsy, picked up a sexy black satin robe at Victoria's Secret and went for it!  

Making sure it was straight was definitely stressful but in a few minutes it was ready to go! 
I'm in love with the results. Hope this sparks an idea for you!


Bachelorette Party Favor: Hangover Kits

My college roommate Allison is getting married and it's freaking me out! Yes, we're 25 and everyone around us is getting married or having babies... but still. It's a weird thought. Either way, we were going to celebrate with her in a way only worthy of Pinterest. Her maid of honor Tatiana and I scoured our favorite pinning site to find the coolest ideas for party favors. 

The final result. Hangover kits. 

The ones we found though were only inspiration. We planned to go above and beyond with these hilarious beauties. After raiding the Target travel aisle, a quick trip to Michael's for the boxes, a little origami bow action and making name stickers, assemblage was ready to happen!

Contents:
Gatorade
Tums Refreshers (breath mints AND Tums - Two birds. One stone.)
 Advil
Notepad & Pen to write advice to the bride
Hair ties
Goldfish packet
Makeup Remover Towelettes
Blistex
Hello Kitty Bandaid


If you're going to recreate these I recommend printing out the Hangover baby which I Photoshopped to included the word "Kit". 


For the outside of the box, I wanted something 3-dimensional so I started looking up origami bows. It took practicing three times before I finally got it right. I used a gold and cream chevron paper to give it some dimension and interest. Use this YouTube tutorial and spare yourself the awkwardness of trying to Google translate Chinese step-by-step images. Trust.


Finish off the box with a cute custom label. I used my best amateur photoshop skills and made a few tweaks after I printed them.


The final result was incredible. Happy Bacheloretting!


DIY Beach House Headboard

I've been lusting after this Coastal Living headboard ever since we met on Pinterest/Elements of Style Blog. I had to have it. However my stereotypical Dutch family who commissioned me to redecorate our family beach house was not going to splurge on a big expensive headboard. Knowing this I had to create it all from scratch, which meant under $100! 


Copying the same lines as the photo, I used a ruler, pencil, and string to recreate the shape.


After a lot of research I found that the best way to upholster was to use an egg crate foam mattress topper (two twins on sale at Target for $7.97 each!) and put them egg side to egg side so the flat side faces out. We then stapled along the edges to keep it in place (some stayed, some didn't) and then wrapped a layer of batting around it to keep the foam in. This created a thick and cushy headboard.


I ventured off to a fabric store other than Joann's that specialized in upholstery fabric to ensure that it would last a long time. I needed to match this beachy blue and keep the fabric a soft linen. For around three yards it was $37.


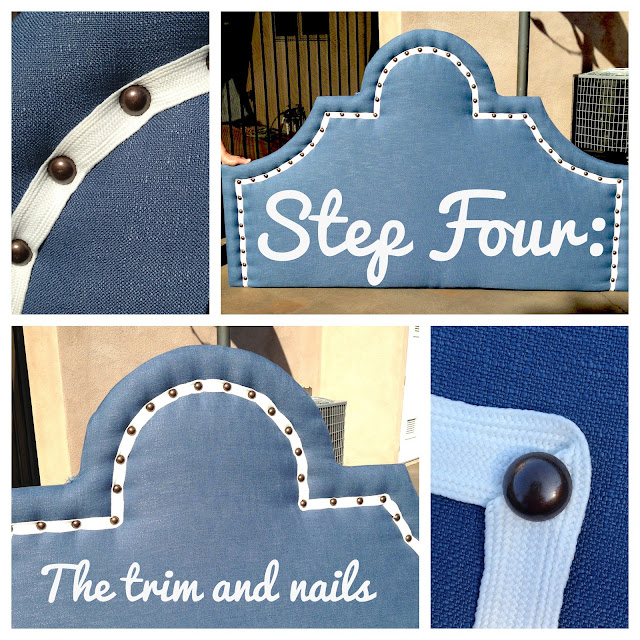
Now it was time for the lovely details. The trim came from Joann's for $7 and the oversized 13/16" Brass finish nails came from Beaconfabric.com at a splurge of $42. The corners were a fun test of my folding capabilities, but I prevailed! I gently tucked a bit of the trim underneath itself and covered the overlap with a nail. Be careful as you're hammering the nails in. If you hit them too hard or too many times, you'll scratch off the finish. 
Voila! All UNDER $100!


It's Installed!!


 Now it's on to the rest of the room. Next project... painting!

Related Posts Plugin for WordPress, Blogger...